


Customized Production System
SEAL
business
-

-
BUSINESS
-
SEAL
-
Product
products
Appendix
-
INSULATION SETS
-
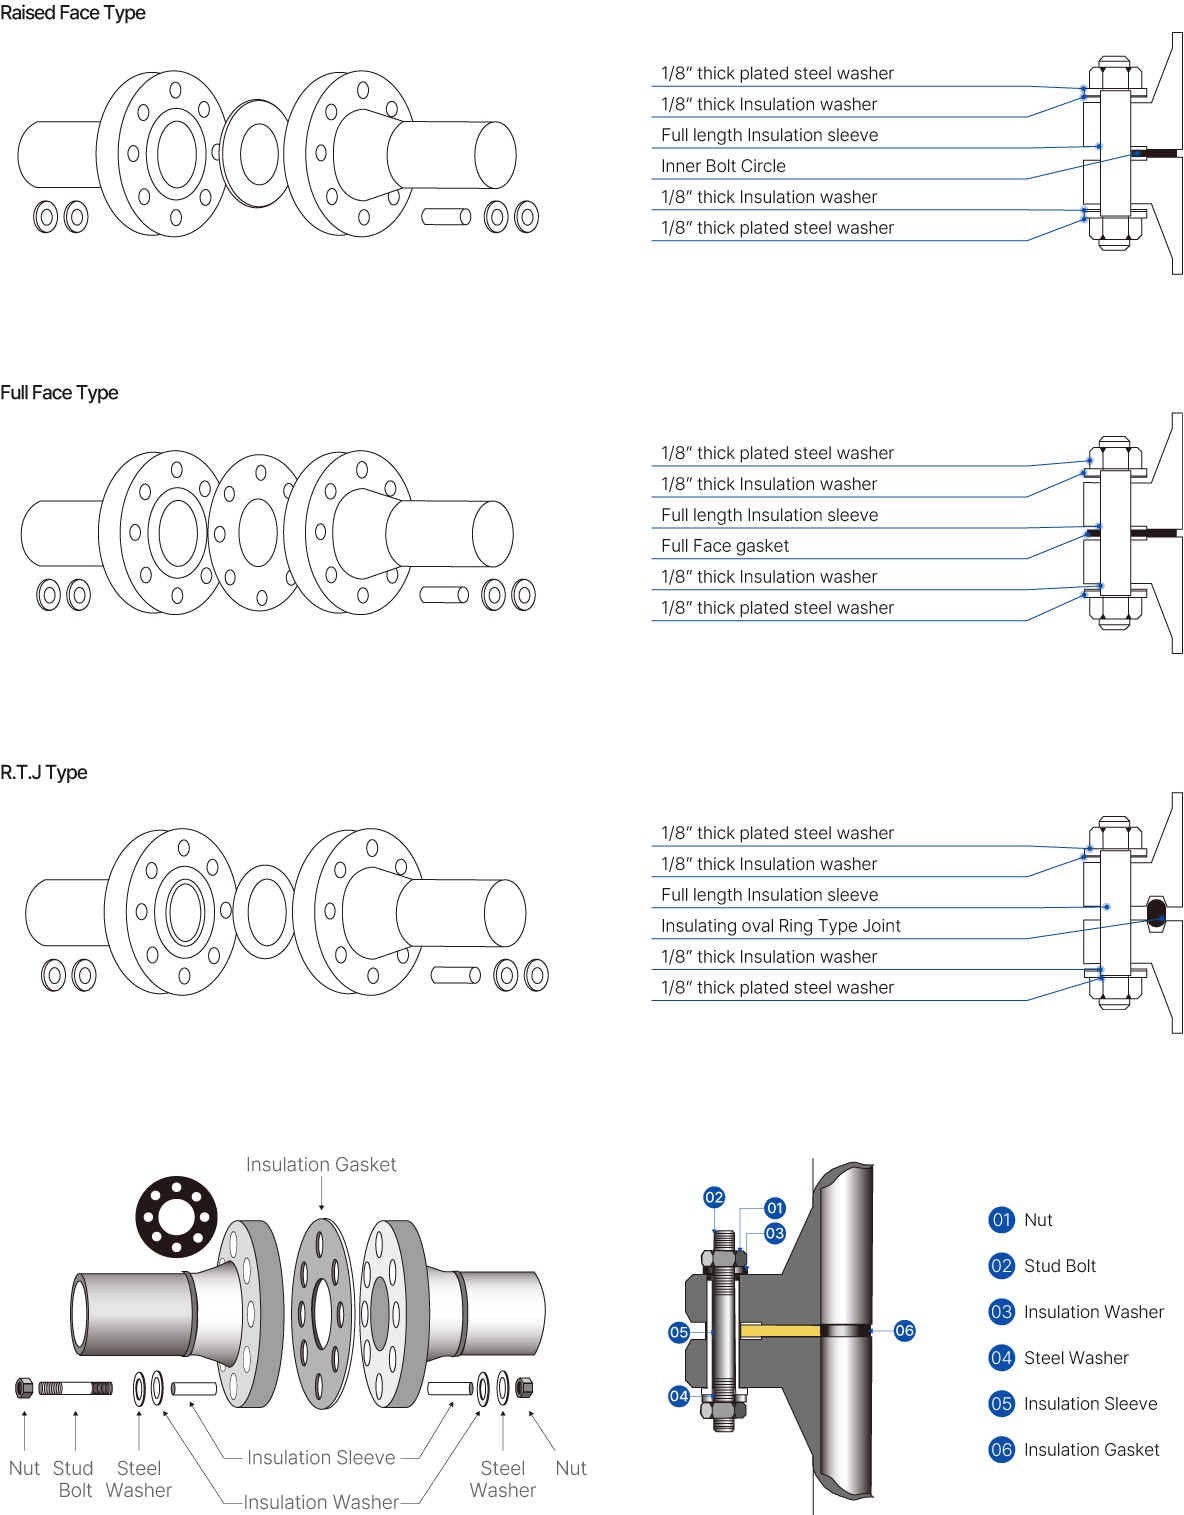
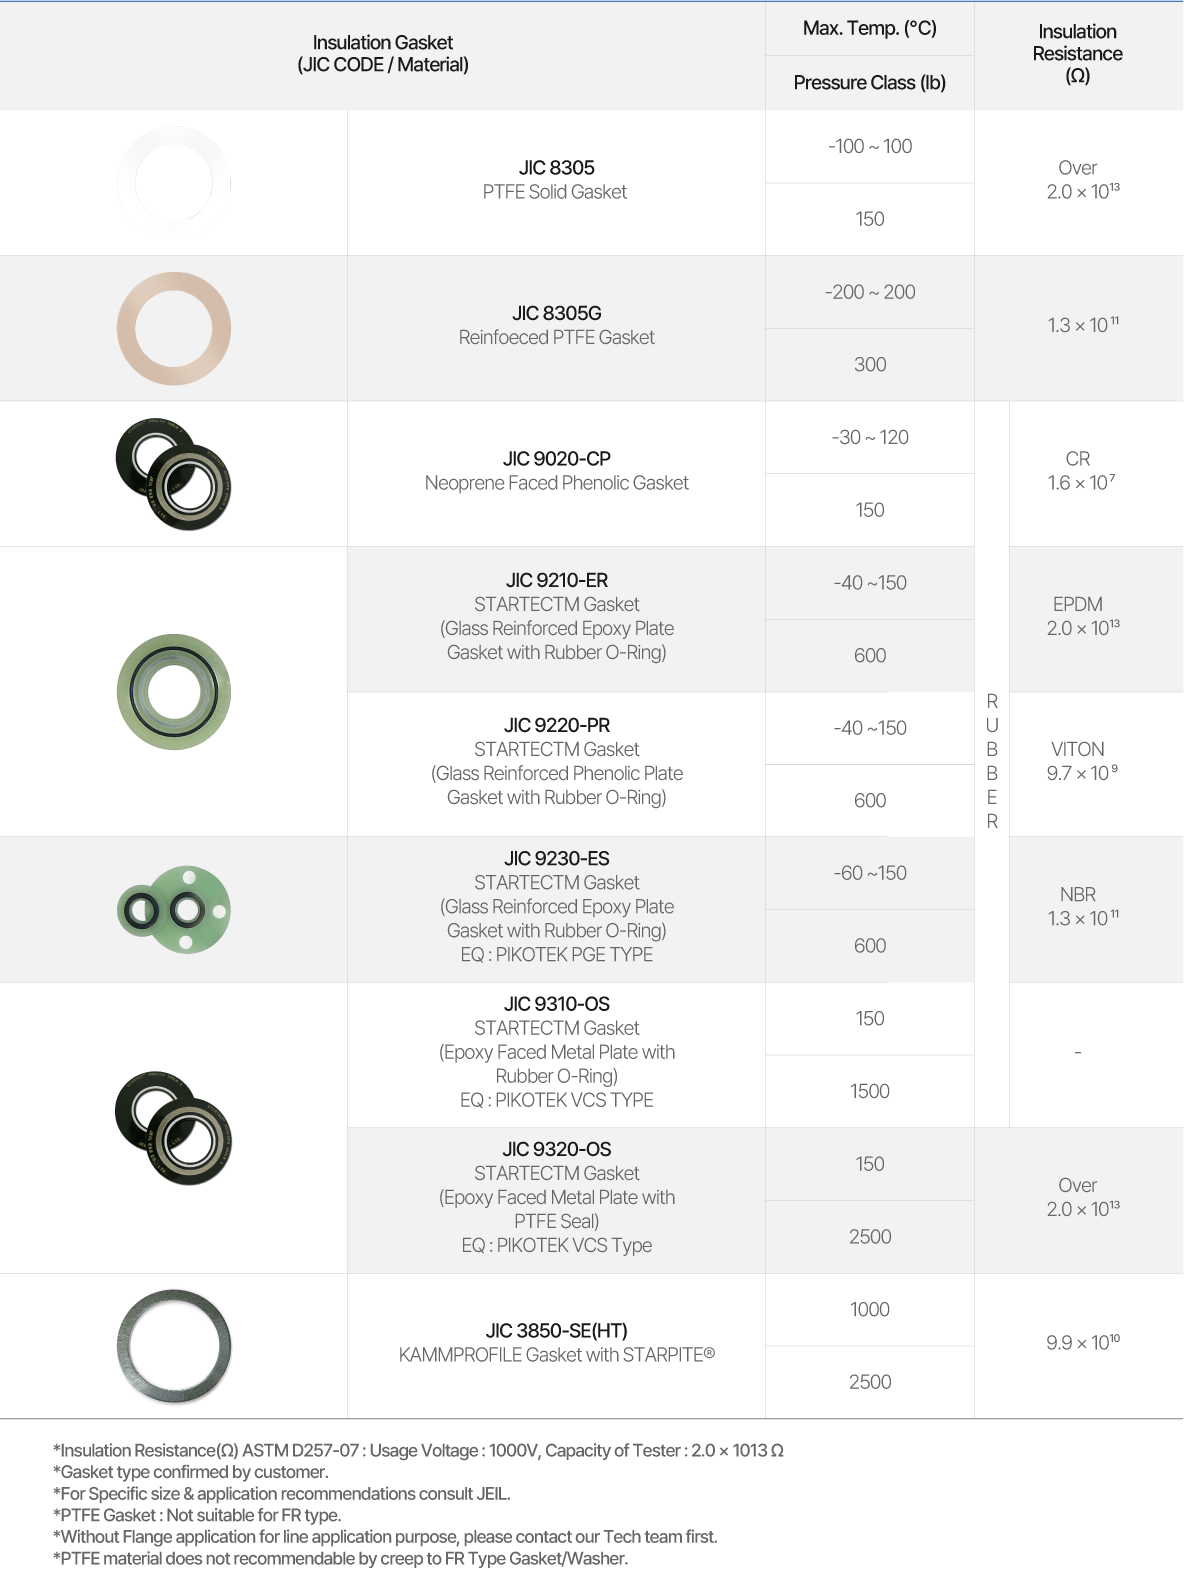
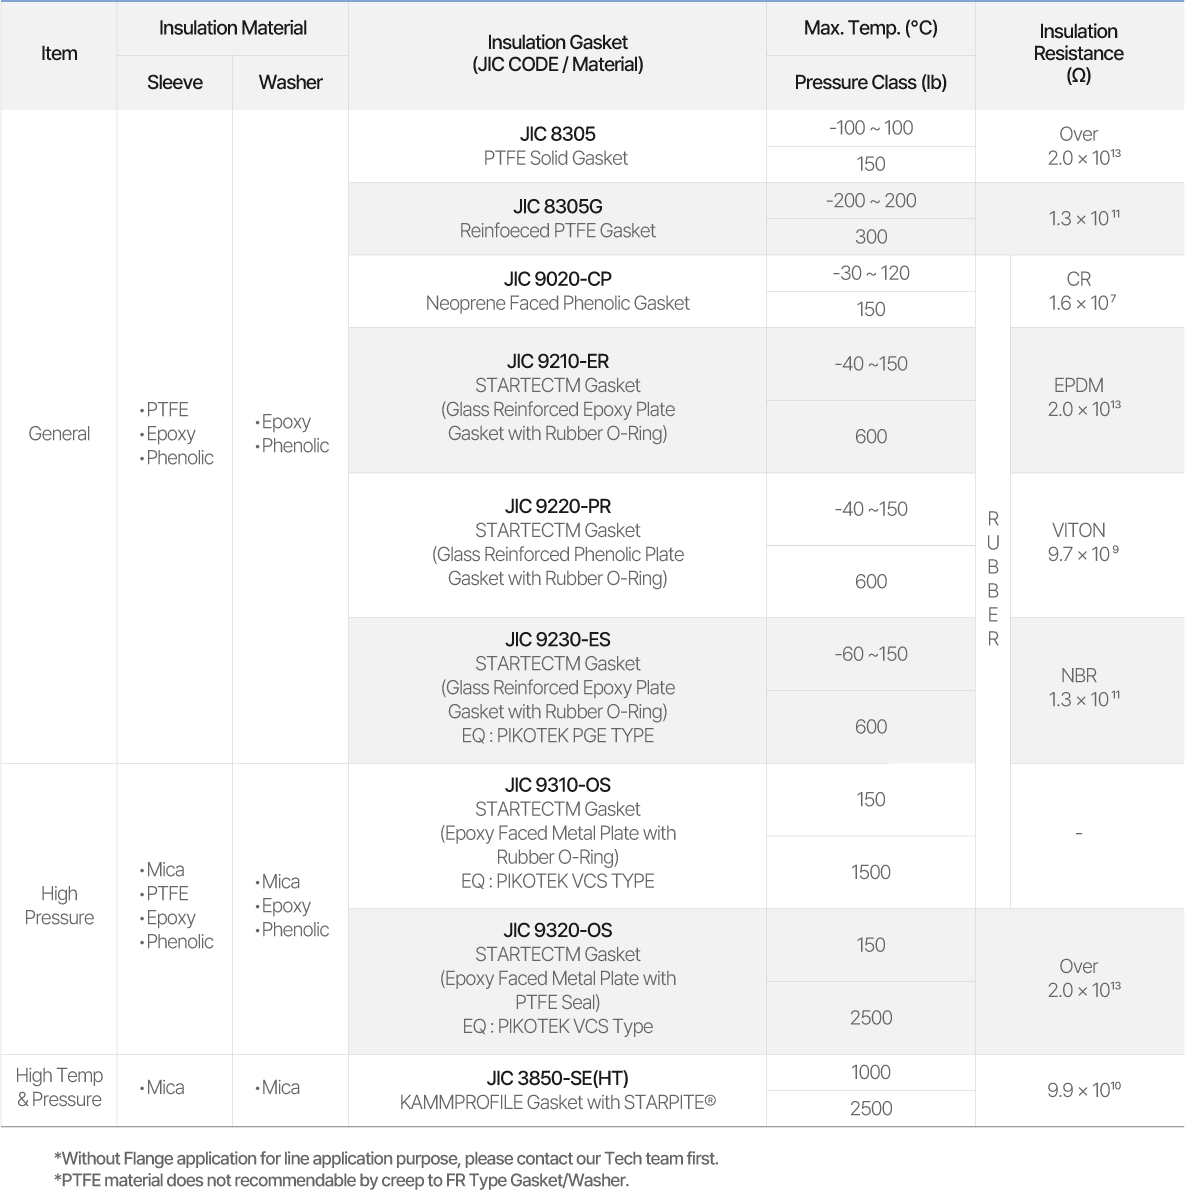
Insulation sets are used for pipeline flange corrosion protection and for complete electrical insulation protection where a seal is required between dissimilar flange materials. There are three standard styles available to suit raised face, full and ring grooved flanges.
-
Creative Technology
SEMIFLON, a company that considers the environment
through sustainable technology development
-
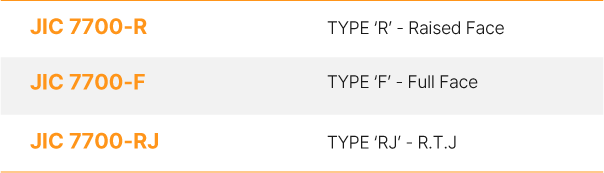
Standard Styles of Insulation Sets
-
-
Bolt / Nut / Sleeve / Washer
-
-
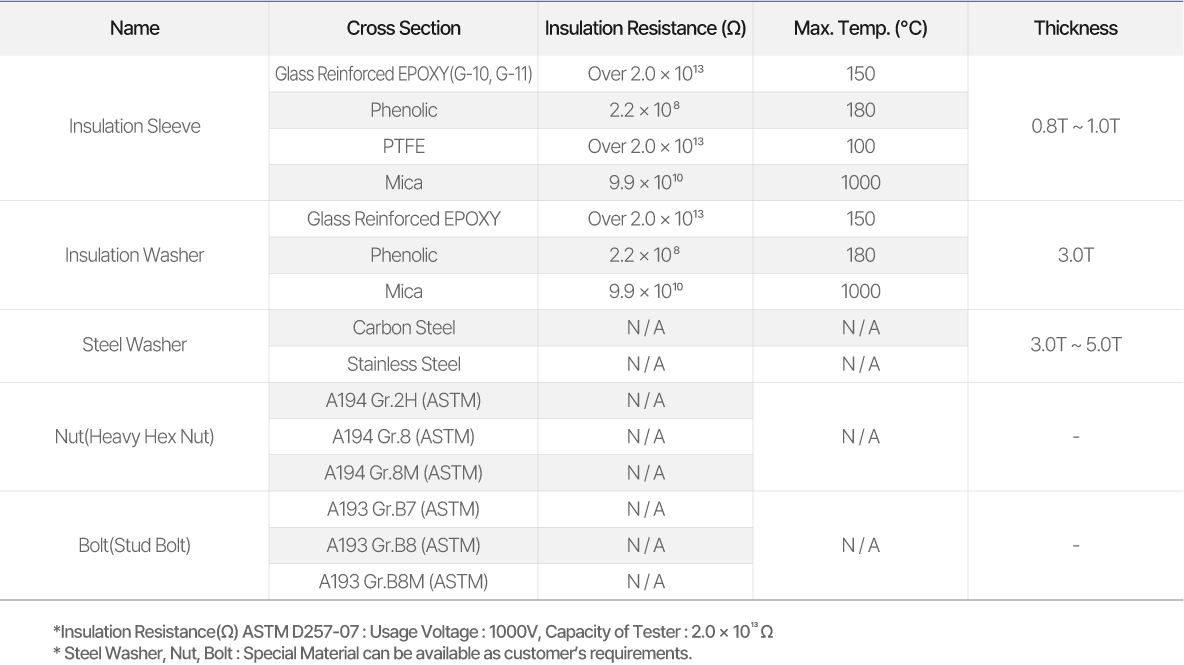
Insulation Set(Isolation Kit) Products
-
-
Insulation Set(Isolation Kit)
Mounting Procedure and Precautions -
-
1. Tools required
Specific tools are required for cleaning and tensioning the fasteners. Additionally, always use standard safety equipment and follow good safety practices.
a. Calibrated torque wrench, hydraulic or other tensioner
b. Wire brush (brass if possible)
c. Helmet, Safety goggles, Lubricant
d. Other plant-specified equipment
-
2. Cleaning
Remove all foreign material and debris from
-
3. Examine
a. Examine fasteners (bolts or studs), Nuts and washers for defects such as burrs or cracks. Check insulating washers and insulating sleeves are torn or cracked.
b. Examine flange surfaces for warping, radial scores, heavy tool marks, or anything prohibiting proper gasket seating. Make sure the gaskets are isolation gaskets.
c. Replace components if found to be defective. If in doubt, seek advice.
-

-
4. Install Gasket
a. Ensure gasket is the specified size and material.
b. Examine the gasket to ensure it is free of defects.
c. Carefully insert the gasket between the flanges.
d. Make sure the gasket is centered between the flanges.
e. Bring flanges together, ensuring the insulation materials (insulation sleeves, washers & gaskets) aren’t pinched or damaged.
f. Put insulation sleeves on the bolts and insert insulation washers and steel washers.
-

-
5. Install and tighten fasteners
a. Always use proper tools Calibrated torque wrench or other controlled tensioning device
b. Consult your gasket manufacturer for guidance on torque specifications
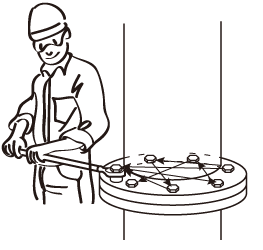
c. Always torque in a cross bolt tightening pattern.
-
-
6. Tighten the nuts in multiple steps
Step 1. Tighten all nuts initially by hand (Larger bolts may require a small hand wrench)
Step 2. Torque each nut to ~30% of full torque
Step 3. Torque each nut to ~60% of full torque
Step 4. Torque each nut full torque, again still using the cross bolt tightening pattern (larger diameter flanges may require additional tightening passes)
Step 5. Apply at least one final torque to all nuts in a clockwise direction until all torque is uniform (Larger diameter flanges may require additional passes)
-
7. Re-Tightening
A . Caution
Consult yours gasket manufacture for guidance and recommendations re-tightening.
B-1. Do not re-torque elatomer-based, non-asbestos gaskets after they have been exposed to elevated temperature unless otherwise specified.
B-2. Re-torque fasteners exposed to agrresive thermal cycling.
B-3. All re-torquing should be performed at ambient temperature and atmospheic pressure.
-
8. Notes on use
Install a protective cover on insulation sets to prevent exposure on rainy days.
Note : Pay attention Insulation set of Mica material in particular.
